Crafts for kids, at home or at school
{for crafty cubs & their foxy mamas}


Hatching Dinosaur Eggs for Easter
After falling in love with dinosaurs at the age of 12 months, Tadhg is still dinosaur mad. He also happens to love those eggs that you leave in water until a baby dinosaur hatches.
In fact, he gets so impatient that he has been known to drop them over the verandah on more than one occasion. This weekend we decided to try making them for our Easter baskets. With a twist - these eggs hatch fast!
If you know someone who happens to love toys and is also very impatient, then this is for you! A Hatching Bath Bomb for Easter. Here's how to make one at home.
You'll Need:
-
150g / 2 cups bicarb soda (sodium bicarbonate if you're in the UK, baking soda in the US)
-
75g (2 1/4 oz) citric acid25g (1 oz) corn flour, also called corn starch
-
1/2 tsp powder colour or 2 drops food colouring
-
spray bottle of water
-
Sifter
-
Mixing bowl (large)
-
1 easter egg mould / baking mould
-
1 small toy per egg – check first to make sure that your toy fits inside your mould
Notes:
The above measurements made one large egg. If you are using this in a group activity or want to make more than one, you can either use smaller moulds or double your quantities to suit.Any small plastic toys will work but check firstly to make sure that they will fit inside your mould. Plastic rings, lego men or animals are all small enough to fit a regular egg. I used a standard Easter egg chocolate mould to make mine. It was perfect, because it even left the imprint so that the egg looks like it's about to hatch! If you don't have any old Easter egg moulds in the cupboard, you should be able to find chocolate moulds in stores or online.Experiment with different colours for a truly personal gift.
Steps:
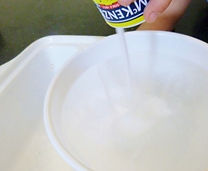
1. Sift bi carb soda, citric acid and corn flour into a bowl. Use a spoon to gently comb over the dry ingredients and push them through the sieve.
2. Add a few drops of colouring. This is the best part for kids, as the ingredients will react immediately and start to foam
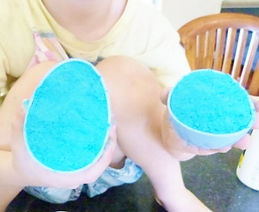
3. Mix through until the colour is evenly distributed and there are no lumps. This is best done with your hands, gently rubbing the mixture between your fingers. Spray the mixture several times with your spray bottle. Go slowly so that you don't add too much water
4. Your mixture should have the consistency of damp sand. If it is too wet it won't set properly and if it is too dry, your bath bombs will crack coming out of the moulds. If you take some in your hands, squeeze it and it retains the shape, it is ready.
5. Spoon mixture into the moulds. Do one side first and then the other.
6. Before your second mould is completely full, add your toy
7. Pack the mixture in firmly, on both sides. The tighter the moulds are packed, the better the result. Make sure that you have completely covered your toy and that you can't see it at all!
8. Squeeze both sides of your mould together. Press firmly and rotate your egg slowly, checking that there are no gaps the whole way
round. Wipe any excess mix away
9. Leave to dry. Make sure your egg is somewhere safe (and can't roll off the table).
10. Drying times will depend on the size of your mould and how hot it is where you live. We left our egg for about 2 hours outside on a warm sunny day. If it's wintery and cold outside, you can either leave your egg somewhere warm (like inside near a window) or leave as long as it takes. Overnight should do it.
(You will be able to tell if it is ready, as the two sides should be firmly stuck together.Once dry, you should be able to gently remove one side of the mould at a time, revealing a whole egg. If using a different shaped mould, it will pop out with a gentle push from underneath.)
Ta-da!


When you're ready, pop this into a bath or a bowl full of water, and watch as it fizzes and "hatches". You should be left with a very excited little person, when they find a toy inside.